
Hello crafty neighbors! I hope you are staying safe and healthy through all this crazy COVID situation, and if you are sheltering at home or working from home, I hope you’re not going too stir crazy. It’s been a strange few months around here. It seems like time is both speeding by and at a dead standstill. I don’t know how that’s possible, but it sure feels like the year is whizzing by, even though the days are all the same. My husband calls it “Blursday” because it’s often hard to tell what day it is -- the days all run together. In many ways, I feel like we are still in March, so how can it be near the end of July? What happened to all the time in between?
While nothing is really back to normal around here, we have managed to settle into some routines that help. Hubby is mostly still working from home, but he does have to go in from time to time. We still aren’t allowing visits in our home from friends and family with the exception of my daughter and her soon-to-be family – we have too many wedding details to manage, so she really must be here. The wedding details have kept us super busy all summer, and I feel really bad that I haven’t kept up the blog posts about it as I had promised. Luckily, we’ve done so much work, I have plenty of material to do posts with, so I’m hoping to get back into the habit of sharing those details here.
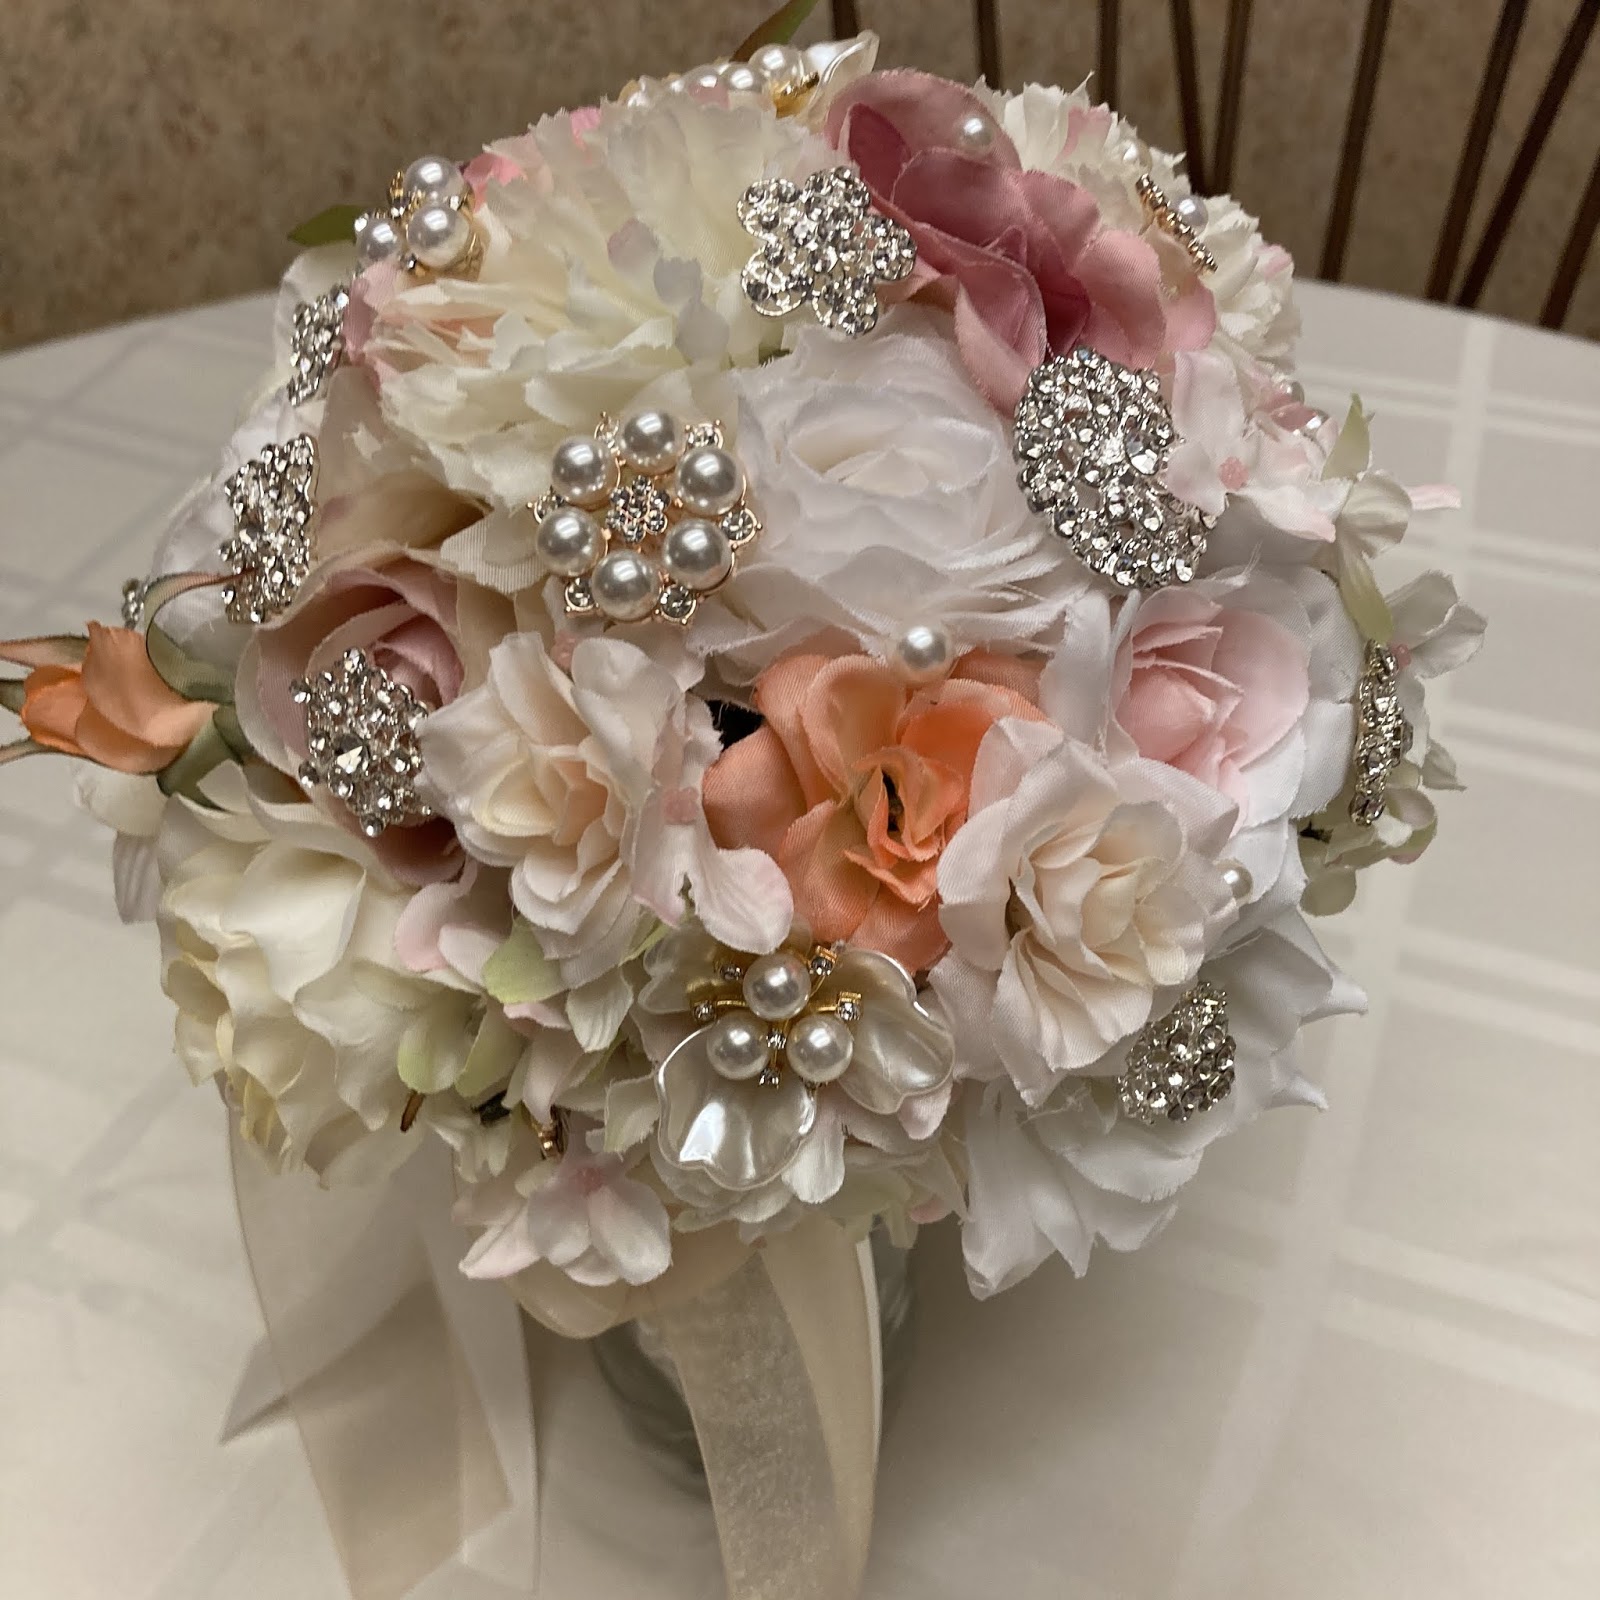
 My most recent wedding projects have been making all the floral arrangements. We opted to do our own rather than spend a fortune on fresh flowers that wilt in a day. I had long admired the beautiful brooch bouquets I saw on Pinterest, so we thought we’d give that a try. You can see some of the one’s we liked on my Pinterest board here.
I started by ordering a large variety of brooches on Amazon. I’ve linked below to some of the ones we found. I was really surprised at how inexpensive they were, but a little bit disappointed in the availability of brooches in rose gold. Most of what we found was traditional gold and silver, and with the tiny pictures that are often used, it can be hard to tell. Some of the brooches we ordered looked rose gold but turned out to be gold instead. It was okay, they still worked, but that was not what we were looking for.
Actually starting on making the bouquets was a bit daunting, and I kept putting it off as long as I could because I’ve never really done any floral arrangements and I wasn’t sure if I had the skills. In actuality, it turned out to be quite fun, and I think I did a pretty good job of it for a novice. I think the hardest part was settling on the design – there are so many ways to do it!
We originally planned to use the wooden dowel and Styrofoam ball method, but the more I looked at those, the less I liked that perfectly round design. An alternative was to buy plastic forms, which were ok, but didn’t really match the esthetic of Christen’s country chic theme. Besides, it would mean yet another trip to Michael’s or Hobby Lobby, and we wanted to save money. We settled on a more natural look using the faux stems on some pretty little floral bundles we bought at Michael’s. If you’re being ultra frugal, you could use these just the way they are; they were tied up with raffia and are pretty much a bouquet in their own right. You could add a bit of ribbon or lace to dress it up and you’re good to go.
 We wanted to add a little more variety to the flowers, but we liked the faux stems on these. Luckily, they slide right off and can be used on pretty much any floral stem. When I had the shape and flower placement the way I wanted, I bundled them off with rubber bands to hold them in place and started adding the rhinestones.
There’s a lot of variation in brooch bouquets…everything from all brooches and no flowers to all flowers with just a few brooches. We wanted a mix of both. There are also several different methods of adding rhinestones to the flowers. Originally, we planned to turn the brooches into floral stems by wrapping floral wire through them. This method works really well if you are using the Styrofoam base, but not so much for bundling with natural or faux flower stems. Instead, we used the more common hot glue method, and it worked very well since we had a mixture of brooches of different sizes, both with and without pin backs.


The first one I did was the tossing bouquet, since it is often a smaller, simpler version of the bride’s bouquet. I figured it would be good practice and it would be okay if it was less than perfect. Once I made that one and was satisfied with how it looked, I had the confidence to proceed with the others. I sorted the remaining flowers until I had a good mix for each of the three remaining bouquets (Maid of Honor, Matron of Honor, and the Bride), and bundled the flowers as I had done with the tossing bouquet. Adding the brooches was quick and easy and I had them done in no time. I started with the largest brooches first, then filled in gaps with smaller and smaller pieces until I was satisfied. I can see how easy it would be to fill the whole things up with brooches!
[Hot glue tip: To prevent those spider-web strands of glue on your projects, let go of the trigger and whip the gun in a circle like you’re beating eggs before pulling away from the project.]
The finishing touches on the bouquet were lace handle wraps. The bride’s bouquet was wrapped with a David Tuterra wrap we bought at Michael’s (don’t forget to use your coupons!). I wrapped the others in lace we had on hand, turning the cut edge under and hot gluing it into place. I added pretty ribbons and a bow, and they were done.


I’m really proud and excited about these bouquets, especially since I had never done anything like this before. It was super simple to do, costs hundredsless than any brooch bouquet you could buy online, and it gave me the confidence to do the other floral arrangements we needed. I hope this gives you the confidence to make one, too!
To view a list of the brooches we purchased on Amazon.com, view our list here.
To view a list of the brooches we purchased on Amazon.com, view our list here.
No comments:
Post a Comment